Paint Protection Film (PPF) has a lifespan, just like tires or brake pads. Even the highest-grade films from Detail by Autostore eventually degrade due to time, climate, or improper care. PPF recovery and replacement, and preparing your vehicle for new protection, are crucial to preserving your car’s paint.
In this guide, we’ll walk through the entire process—from spotting early signs of failure to properly transitioning between systems—all while maintaining your paint’s integrity.
When to Replace PPF
Key Warning Signs:
- Yellowing or Discoloration: Often from UV exposure or aged adhesive.
- Edge Lifting: The film peels back, allowing debris and moisture underneath.
- Cracking or Crazing: Spiderweb-like cracks indicate the film has hardened and is no longer flexible.
- Staining: Chemical etching from bird droppings or acid rain that can’t be cleaned.
- Loss of Clarity or Gloss: A hazy or matte appearance is a signal that the topcoat is compromised.
Timing Your Replacement:
- Standard Lifespan: Most quality films last 5–7 years under normal conditions.
- Climate Impact: Vehicles in harsh sun or salty air may see degradation in 3–5 years.
- Partial Failures: If only one section is failing, it may be possible to replace that panel alone—but watch for color or gloss mismatches.
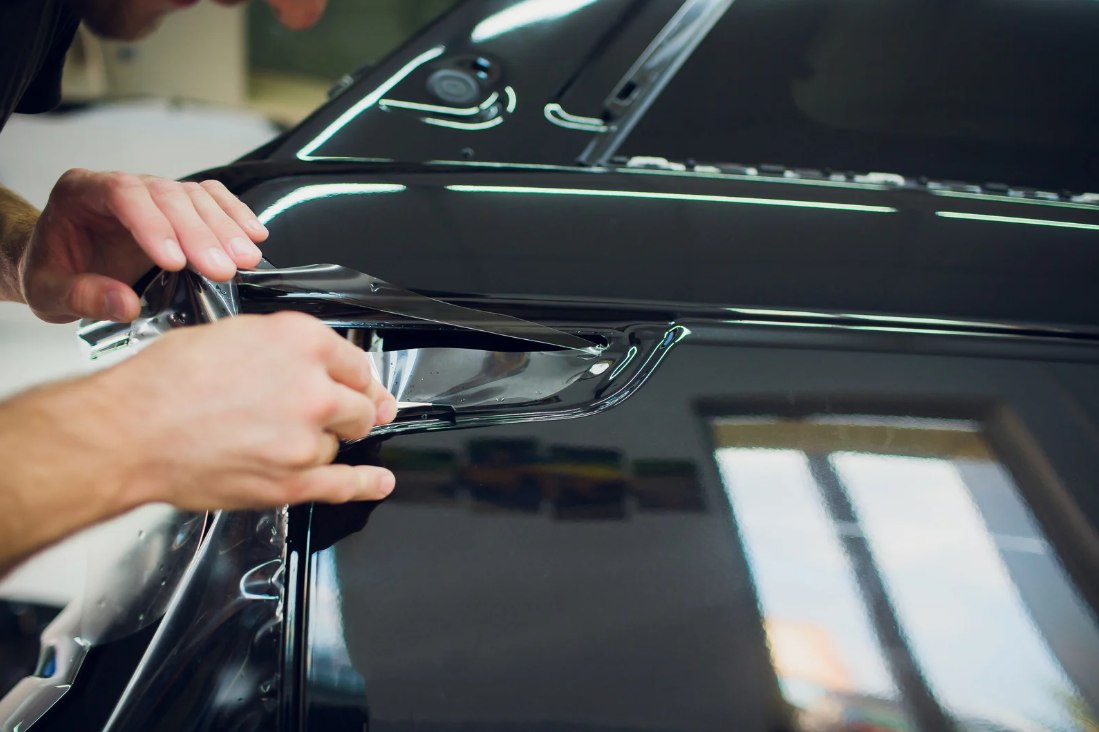
Safe Removal of Old PPF
DIY vs. Professional:
- DIY Feasibility: The older, brittle film is harder to remove and more likely to damage paint. A newer film with intact adhesive can be removed with heat and patience.
- Professional Benefits: Trained installers use steamers, safe solvents, and precision tools to avoid paint damage.
DIY Removal of Old PPF:
- Heat the Film: Use a heat gun or steamer to soften the adhesive.
- Peel Gently: Work from the edges, pulling slowly at a 45-degree angle.
- Remove Residue: Use citrus-based adhesive removers or isopropyl alcohol.
- Inspect the Paint: Look for any signs of etching, fading, or peeling clear coat.
Surface Preparation for New Film
Essential Prep Steps:
- Paint Correction: Even minor swirl marks should be polished out for the best results.
- Decontamination: Clay bar, iron fallout removers, and degreasers ensure a clean surface.
- Dry Environment: Apply new film in a dust-free, climate-controlled area to avoid contamination.
Primer Use:
- Use edge primers on complex curves and high-impact areas to ensure the longevity of the new film.
Upgrading During Replacement
Consider New Tech:
- Ceramic-Infused PPF: Combines hydrophobic top coats with protection.
- Thicker Films: Ideal for high-impact zones or off-road vehicles.
- Custom Coverage: Extend PPF to new areas like the roof or rear bumper lips.
Brand Comparison:
When transitioning from an older generation of PPF to a newer one, be mindful of changes in gloss, clarity, and texture. Mixing brands can work, but test patches are essential.
Final Thoughts on Long-Term Maintenance
Taking steps for PPF recovery and replacement is a smart move when aging signs appear. Think of it not as a failure but as routine maintenance—like changing your oil or replacing tires. Done properly, your new film will protect your car’s paint for years to come.
For expert guidance and removal tools, trust Detail by Autostore.pk to provide the right solutions for every stage of your paint protection journey.